Kubernetes Deployments Part 2: Update Strategies & Production Practices
In Part 1, we covered Deployment fundamentals, scaling, and self-healing.
In Part 2, we go deeper into:
- Rolling Updates
- Rollbacks
- Blue/Green Deployments
- Canary Deployments
- Production Best Practices
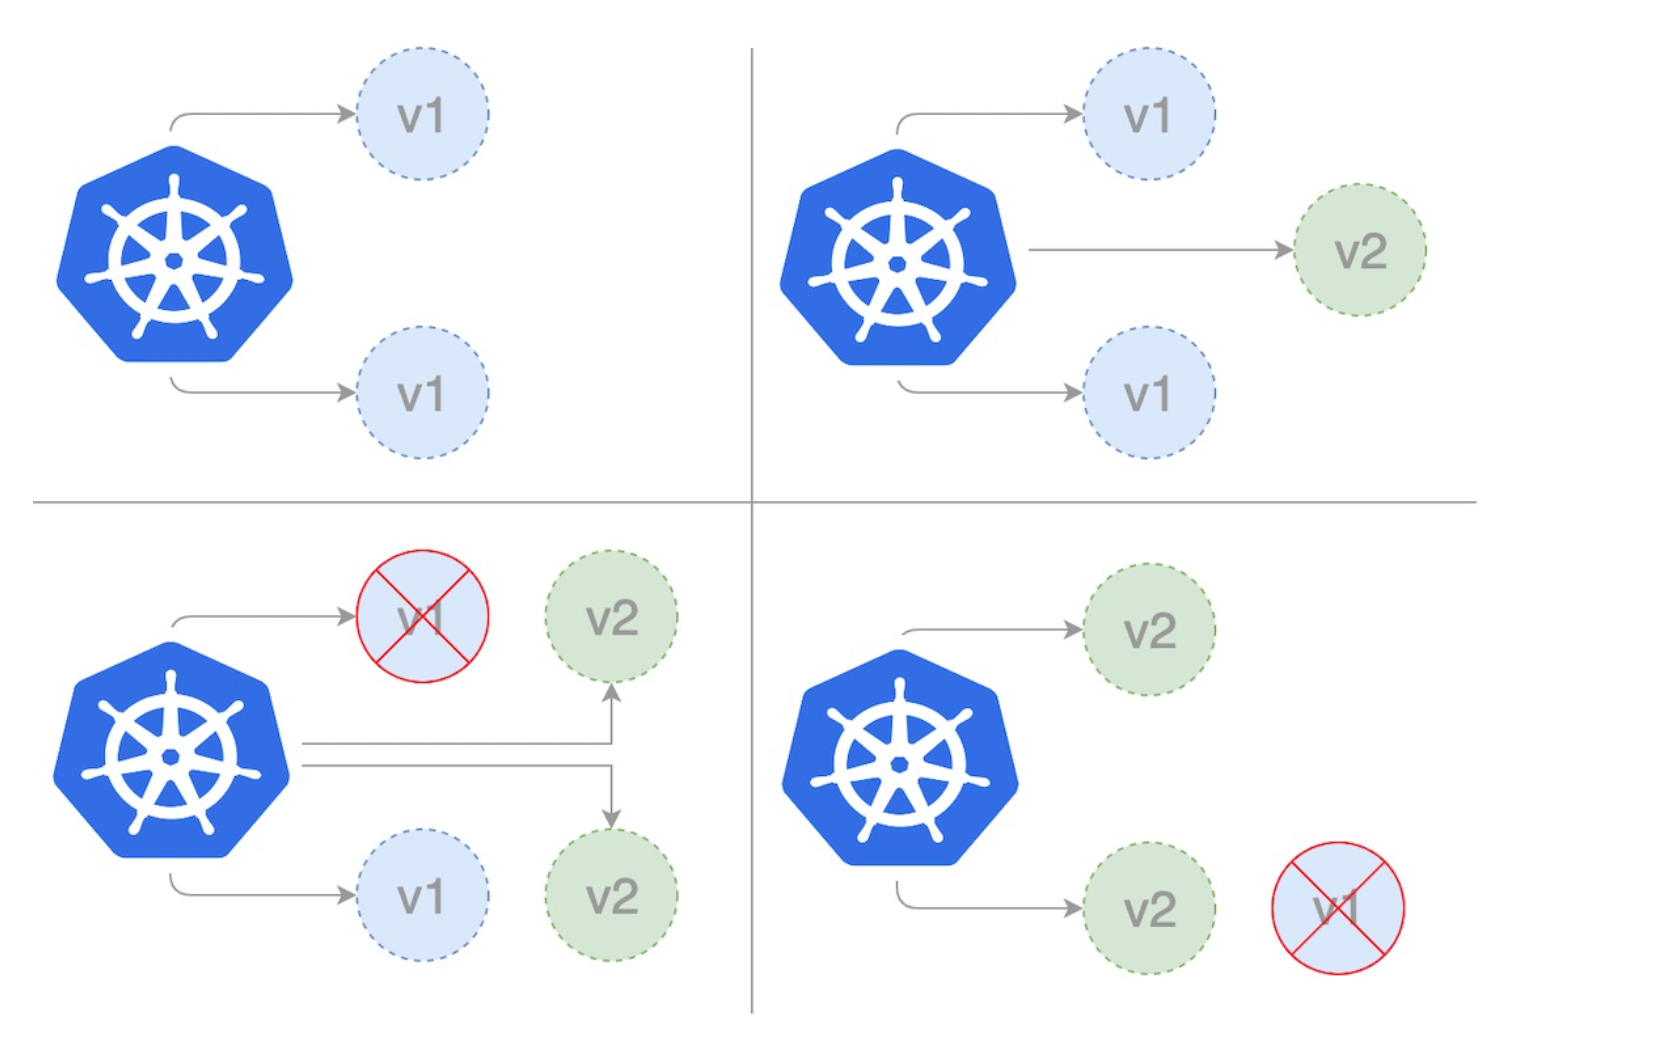
Rolling Updates
Rolling Updates allow you to update your application without downtime.
Instead of deleting all old Pods at once, Kubernetes:
- Creates new Pods with the new version
- Gradually terminates old Pods
- Maintains availability during the process
Rolling Update Configuration
strategy:
  type: RollingUpdate
  rollingUpdate:
    maxUnavailable: 1
    maxSurge: 1
maxUnavailable
Maximum number of Pods that can be unavailable during the update.
Example:
replicas: 4
maxUnavailable: 1
Kubernetes guarantees that at least 3 Pods will always be available during the update.
Why it matters:
- Controls availability
- Protects against downtime
- Critical for production systems
- Important for SLA-based applications
For high-availability systems (banking, checkout, auth services), set maxUnavailable: 0 to ensure zero downtime rollout.
maxSurge
Maximum extra Pods created above desired replicas.
You can read more about maxSurge and maxUnavailable use cases in the official docs.
Updating an Image Version
kubectl set image deployment/web-deployment nginx-container=nginx:1.26
Watch the rollout:
kubectl rollout status deployment/web-deployment
Rollbacks
If something goes wrong, Kubernetes allows instant rollback.
Check rollout history:
kubectl rollout history deployment/web-deployment
Rollback:
kubectl rollout undo deployment/web-deployment
This restores the previous ReplicaSet.
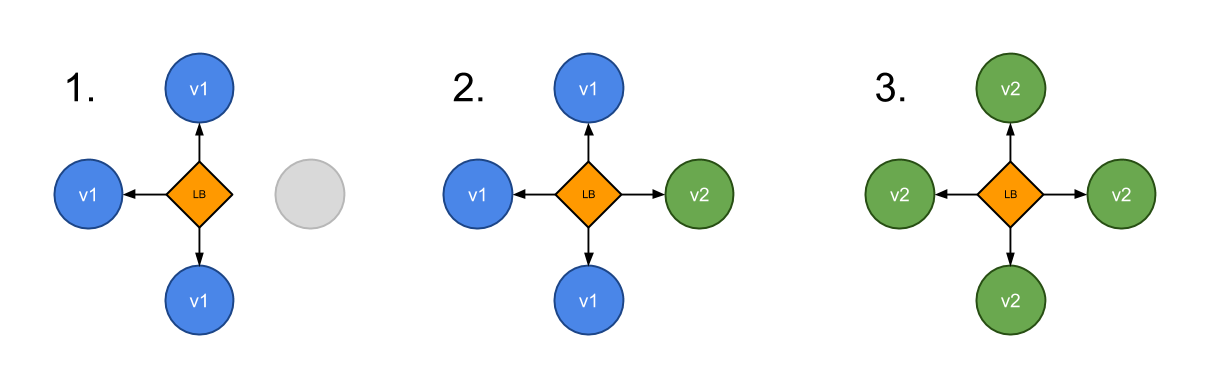
Blue/Green Deployment
Blue/Green means:
- Blue = current version
- Green = new version
- Traffic switches only after validation
Instead of updating Pods gradually, you deploy a separate environment.
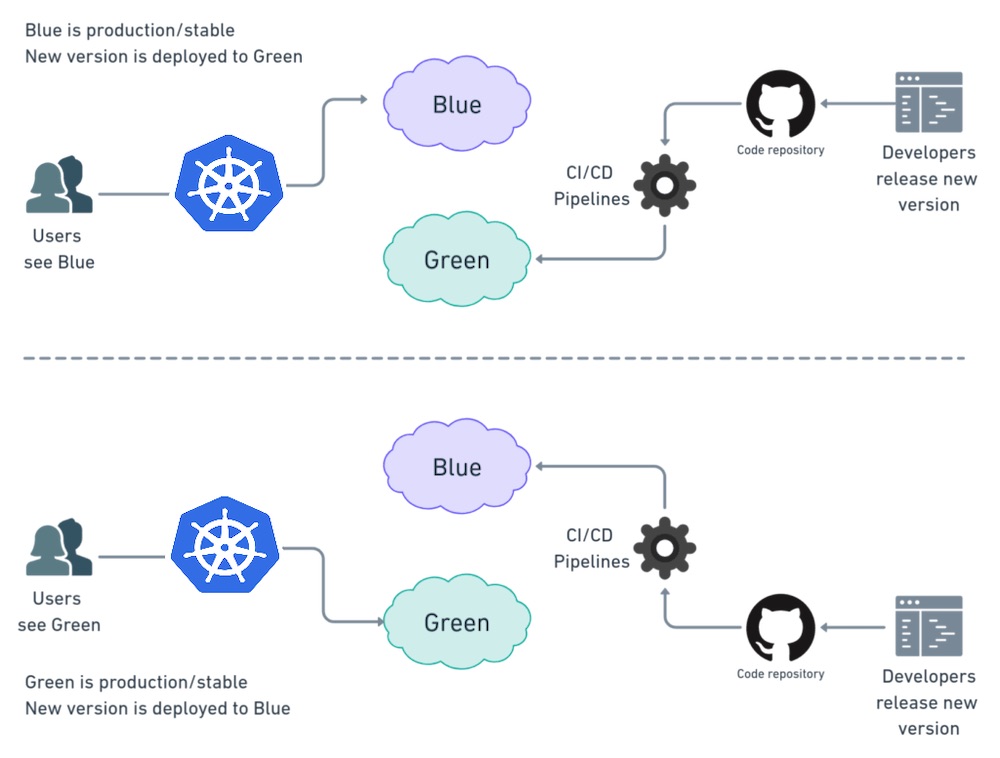
How It Works
- Deploy new version (Green)
- Test internally
- Switch Service selector to Green
- Remove Blue after validation
This provides zero-downtime and safe testing.
Canary Deployment
Canary releases send traffic to a small subset of users first.
Example:
- 90% traffic → old version
- 10% traffic → new version
Canary requires:
- Multiple Deployments
- Traffic splitting (Ingress / Service Mesh)
Used when you want gradual risk reduction.
Production Best Practices
Always Use Probes
livenessProbe:
  httpGet:
    path: /health
    port: 80
  initialDelaySeconds: 10
  periodSeconds: 5

readinessProbe:
  httpGet:
    path: /ready
    port: 80
  initialDelaySeconds: 5
  periodSeconds: 5
- Liveness → restart unhealthy container
- Readiness → control traffic routing
Define Resource Limits
resources:
  requests:
    cpu: "100m"
    memory: "128Mi"
  limits:
    cpu: "500m"
    memory: "256Mi"
Prevents noisy neighbor problems.
Use Proper Labels & Versioning
Example:
labels:
  app: web
  version: v2
Essential for Blue/Green & Canary strategies.
What You Learned in Part 2
- How Rolling Updates maintain availability
- How to rollback safely
- When to use Blue/Green
- When to use Canary
- Production-ready configuration tips
In Part 3, we will explore advanced Deployment topics: - Deployment failure scenarios - HPA integration - Pod disruption budgets - Real production debugging strategies